Creating a feed plan is a really valuable excersise. One of the main benefits it brings is creating a focus on the road ahead. Often when creating feed plans with farmers we have discussed making changes to the status quo to deliver better outcomes. They are a great way to keep challenging the system to improve.
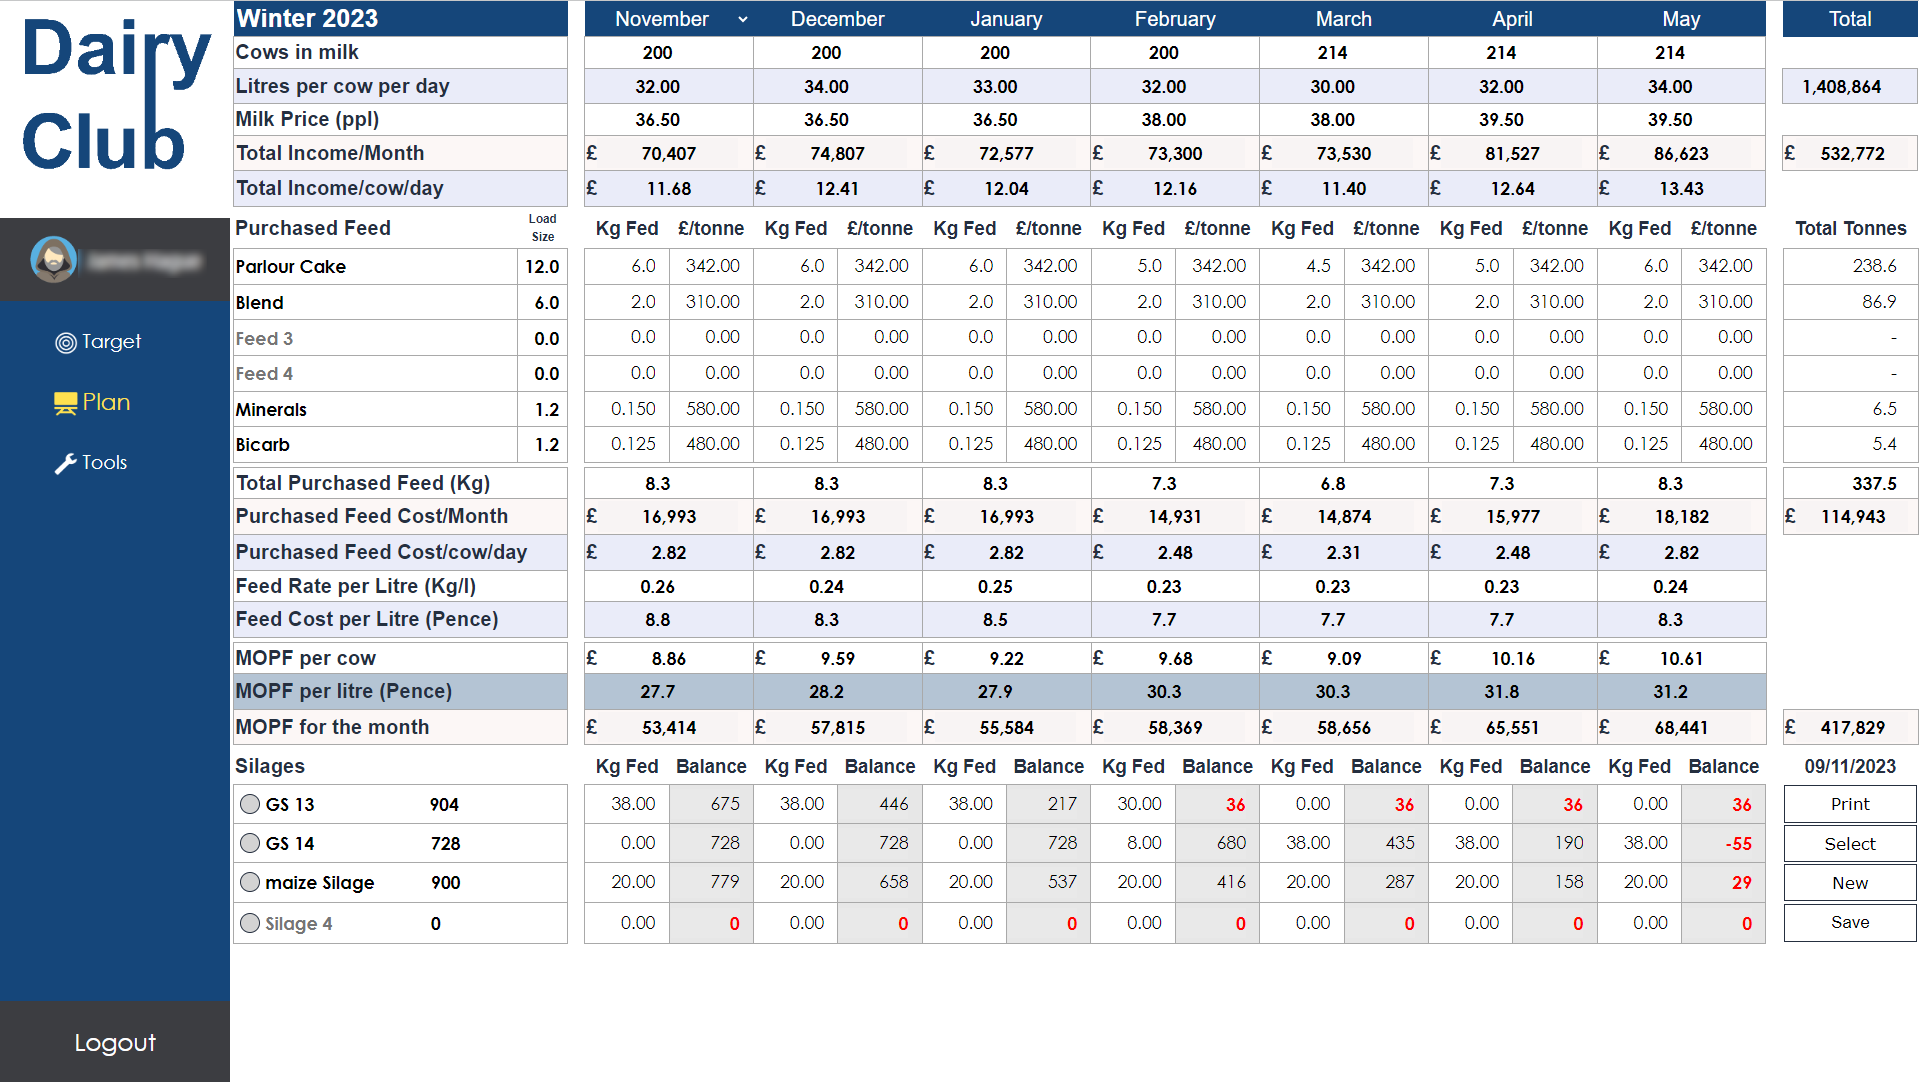
Feed planning can either be complex or simple. Whilst Dairy Club’s Tracker program has a much more indepth feed planner, the one shown below makes for really quick and effective first step. This is available to use FOC for bona fide dairy farmers. Just direct message using the form at the bottom of the page.

The planner is very easy to use.
Step 1 – Select the ‘New’ button in the bottom right corner. When the popup apears then enter the name of the plan you would like to create and select the month you would like to start.

Step 2 – Enter the number of cows in milk and the milk yieled for each month across the seven months.
Step 3 – Enter the milk price. With all values in the first month you can double click them to throw the same value across all the columns. For example, if you put 36ppl in the firts column and double click it, it will populate all the column with 36p.
This will automatically calculate the income for the month and per cow per day.
Step 4 – Enter the name of the first non-silage feed where it says ‘Feed 1’ if you then add the typical load size of that feed (say Dairy cake at 18t loads). by adding the load size when you go to print it will give you the number of days between deliveries. Now add the fresh amount per cow per day and the price per tonne.
Repeat for all feeds.
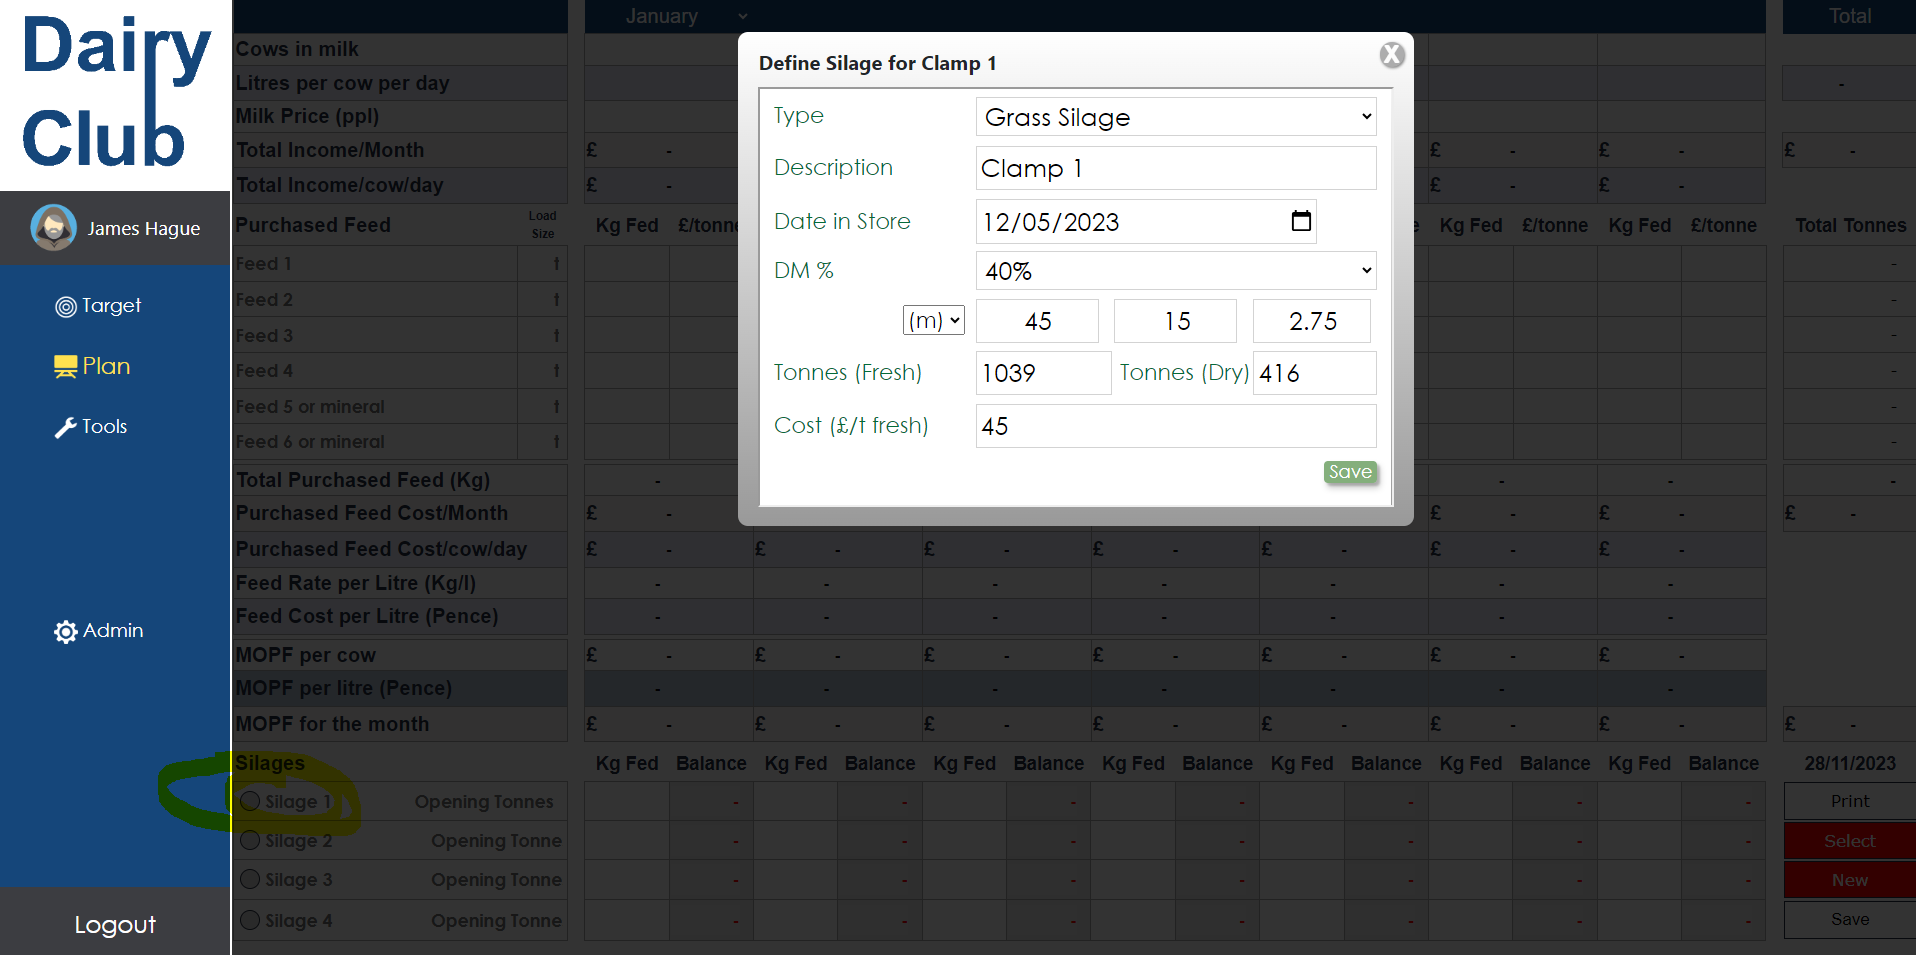
Step 5 – Down in the Silages section you can click on the grey dot to enter silage clamp dimentions. If you already know tonnages you can put these straight into the plan, but if not this feature helps quickly calculate forage stocks.

Step 6 – Next add how many kgs fresh you will be feeding per day. The grey column will then show how much silage would be remaining at the end of the month at that feed rate.

Remember to save. You can create as many plans as you like and retrieve then by clicking the select button.
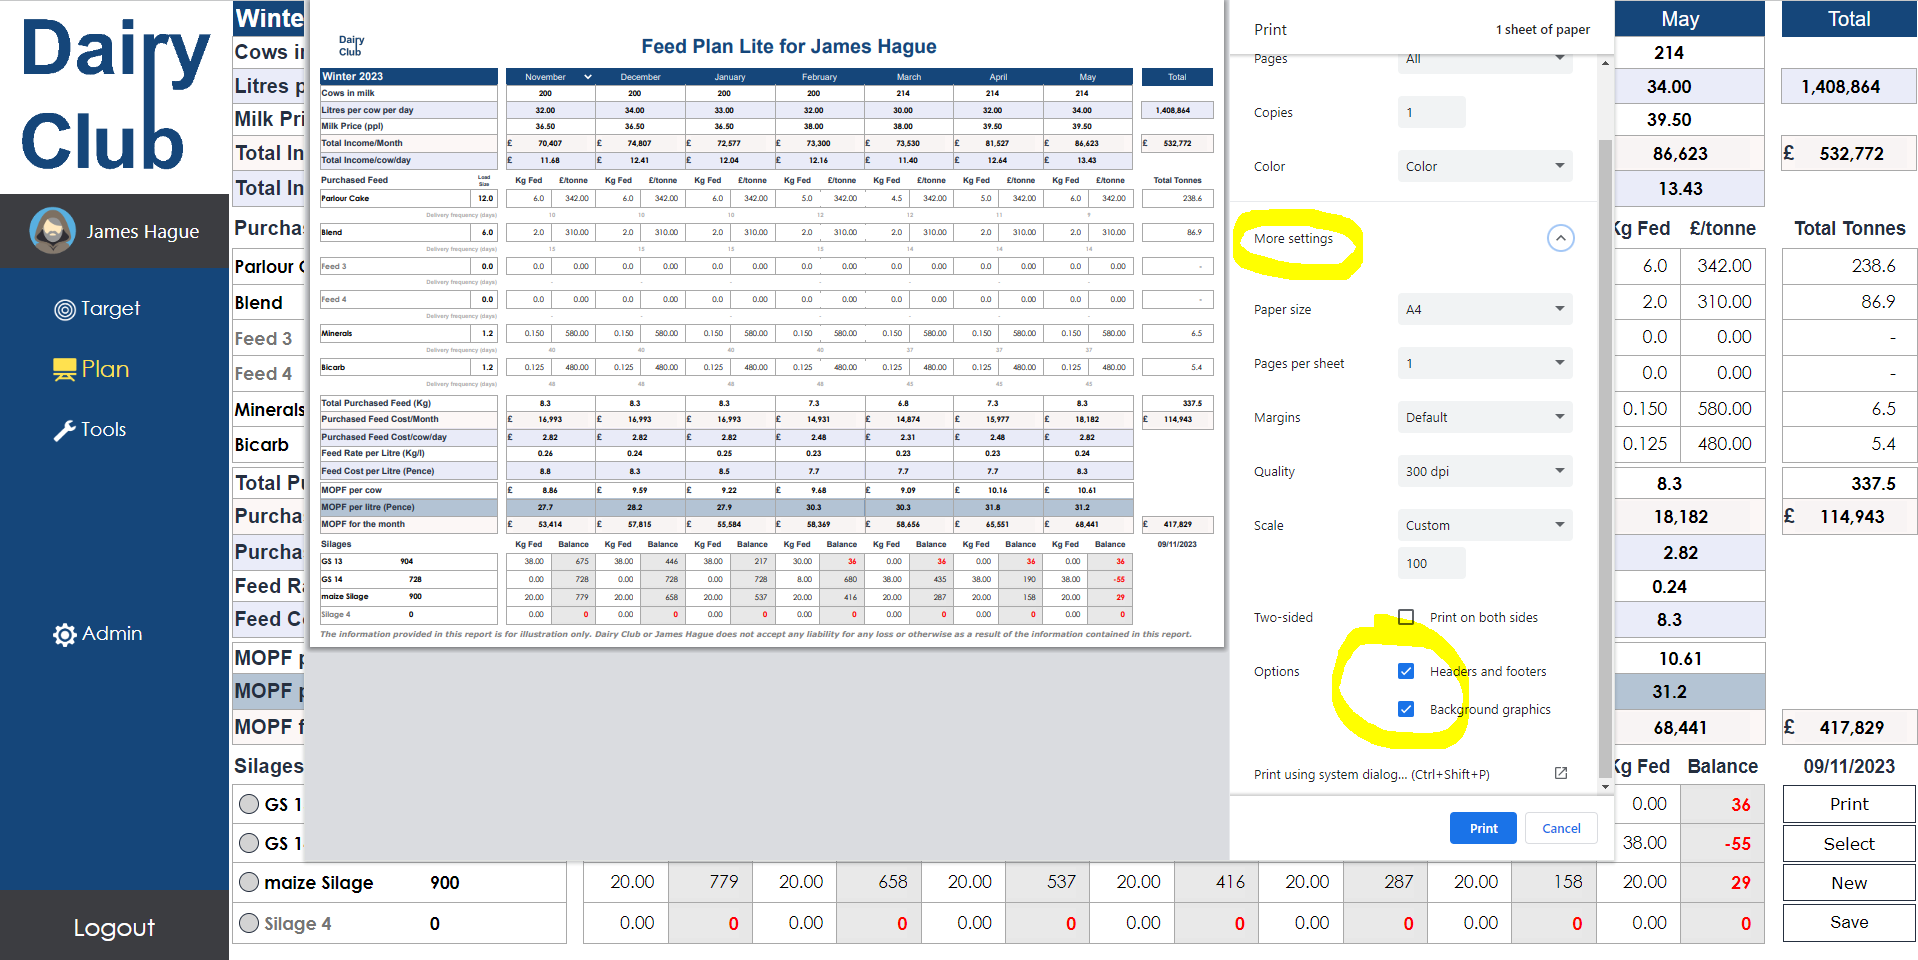
When you hit ‘Print’ you might need to ensure that the Header and Footer and Background Graphics options are ticked to ensure everything prints ok.

Happy planning. If you need any help then please reach out.
